Guitar Design
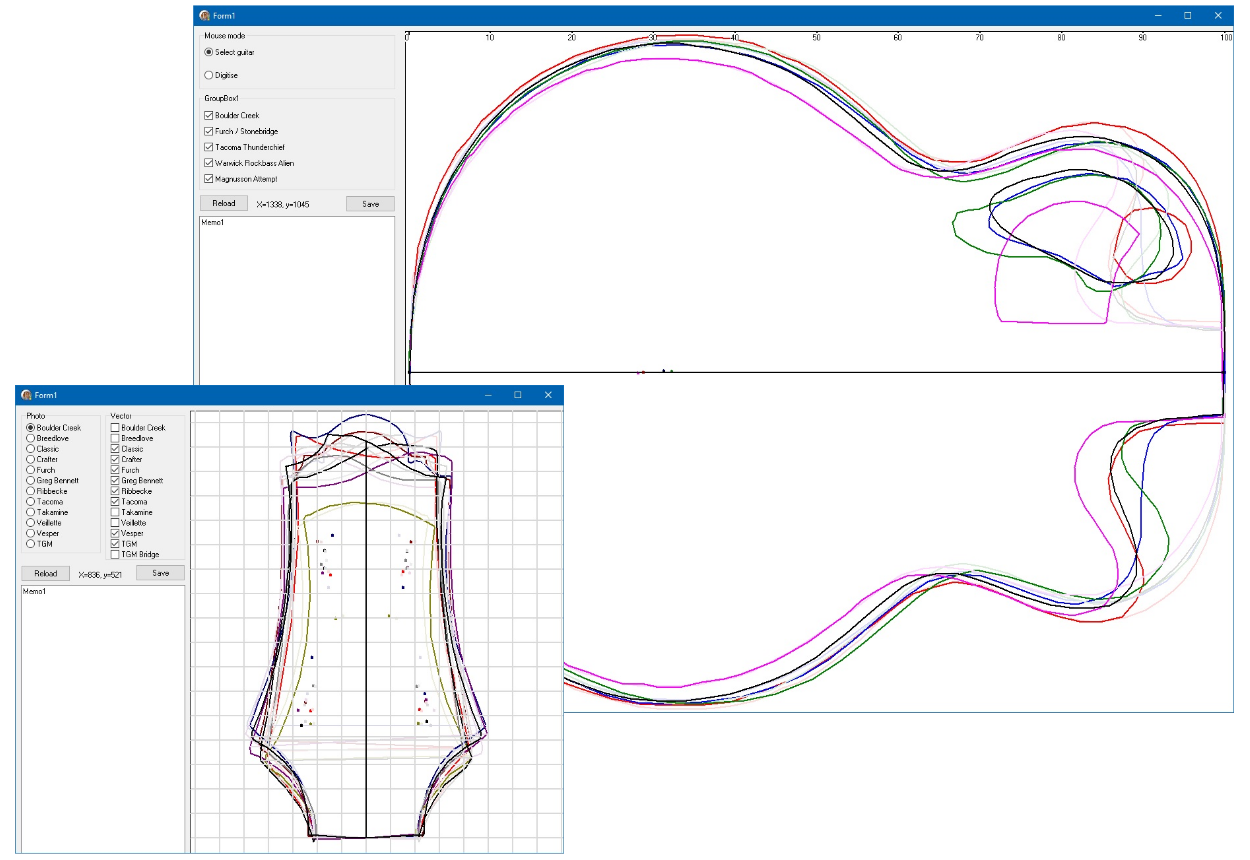
My first goal was to build an acoustic bass guitar could be played acoustically. The first thing that I noticed was that many of the good production ABGs used an asymmetric, off-centre sound hole design and A-frame bracing. I wrote a computer program to digitise and compare the body designs of four leading models.
|
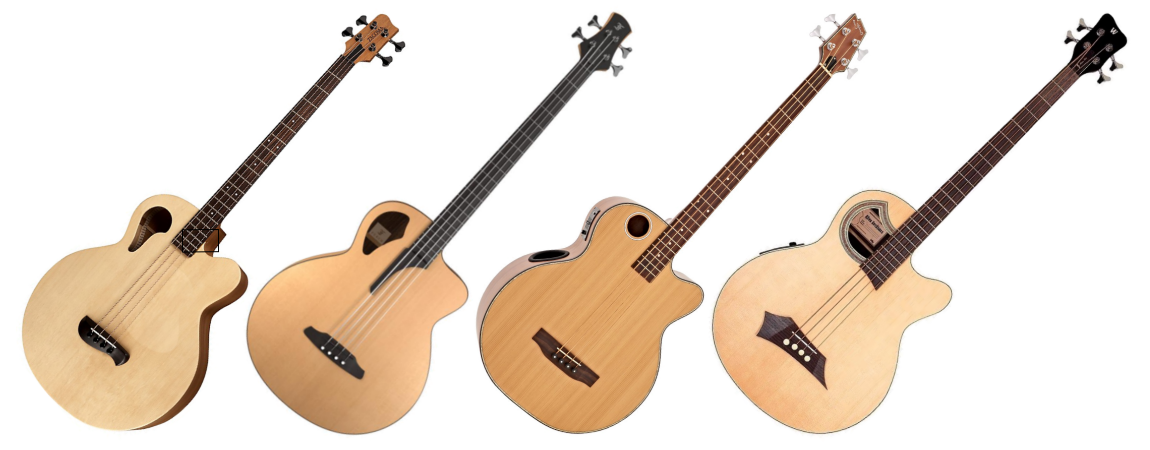
Tacoma Thunderchief CB10 - regarded as one of the best production acoustic basses, sadly no longer being made
Furch B61-CM - a very attractive design. This is a Czech brand, sold in America as Stonebridge, in Germany as Standford
Boulder Creek acoustic bass range.
Warwick Rockbass Alien.
I compared upper/lower bout ratios, waist height, waist depth, cutaway curves, squareness v. roundness, and came up with a design that I felt combined all the attractive aesthetic elements of those guitars, while avoiding aspects that didn't appeal to me as much. I also came up with a wave motif that I wanted to use for the headstock, bridge and fingerboard end.
|
After my first build it occurred to me that this design could be downsized for regular guitars, and I embarked on another round of moulds and jigs for the OM and Parlour models.
Why the offset sound hole?
When jazz guitarists put steel strings on flat-top acoustic guitars in the early 1900s to get more volume, the results were catastrophic. Bracing perfectly suited to gut and silk strings was not adequate for the increased tension. One of the problems was the hole – right where the most strength was needed. The Martin Guitar Company had already introduced the now-ubiquitous X-bracing, and fortuitously, this design responded very well to being beefed up. The resulting guitars had a boomy bass and shimmering top end, but the mid-range frequencies cancelled out. This scooped-mids sound would later be embraced by solo performers, as that dip left a perfect space for the vocal to sit. But the jazz set were unimpressed – you need more mids to play melodies and solos. The Gibson Mandolin-Guitar Company stepped in, introducing violin-like design elements – floating bridge, tail-piece, f-holes – and the archtop was born.
In more recent years builders have experimented with the A-bracing, which works best if the sound hole is moved out of the way. This doesn’t make the guitar sound like an archtop, but it can smooth out the response a bit, a little less bass- and treble-heavy. I felt this approach was best suited to the sort of bass guitar I wanted to own.
After my first build it occurred to me that this design could be downsized for regular guitars, and I embarked on another round of moulds and jigs for the OM and Parlour models.
Why the tail access port?
With a large, central sound-hole it is relatively easy to work inside the body of a guitar – repairs, customisation, fitting pickups, internal mics or electronics. A smaller hole in the upper bout doesn’t allow this access. Putting a port in the tail leaves all those options available again, without any compromise to robustness or sound.
Why the laminated sides and bindings?
Steam bending works best on air-dried timber, however where I live a much better range of kiln-dried timber is available. This needs to be milled much thinner or it will break during the steam bending process. For sides, the laminating process delivers a rigid result, letting me take the sides out of the mould to cut the access port, before attaching the back and soundboard.
Why the engineered neck join?
The traditional standard for acoustic neck joins is the tapered dovetail, as it is strong and self-clamping. But it has very little room for error, and if things go wrong it's quite near the end of the build. I developed my approach of a constructed neck block and tongue, with bolts for clamping only, to get around both of those issues.
It is very strong, relying on glue's immense shear strength
It is much harder to get wrong
I finish building the components before starting the neck or body
When fitting the neck, it allows a lot of adjustability if required, via shave 'n' shim on the tongue
Why the stacked heel?
The one-piece neck+heel wastes a lot of wood. You have to get a very thick, correctly aligned, quarter-sawn board, and then throw most of it away (although some could probably be reclaimed for bracing or something). By stacking pieces of 19mm (.75") timber there is far less waste and far more choice when choosing the boards. I also take care to stack aligned, adjacent lengths, giving a harmonous appearance.
What’s next?
I am currently experimenting with different scale lengths and body-fret numbers for each size.
|
All content Copyright 2022 Trevor Magnusson


